

BESGEER Starter Kit + Frame
All-in-One Beginner Bundle
By BESGEER
Everything you need: tufting gun, frame, trimmer, 42 yarn rolls, and cloth included.
Frame Included42 Yarn Rolls
Apr 05
Did you know that punch needle tufting is not only a fun craft but also a way to express your creativity through various home decor items? Dive into this exciting technique that allows you to create beautiful, textured designs!
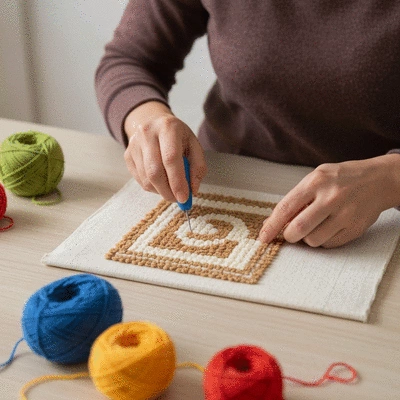
Embark on your punch needle adventure with the right essentials and a clear path from beginner to confident artist. The visual below outlines the key stages and components for a successful crafting experience. For those looking to get started, understanding the basics of tufting kits can provide a solid foundation.
Are you curious about punch needle tufting? This exciting technique involves using a specially designed needle to create textured designs on fabric. It's a fantastic way to create custom rugs, wall hangings, and various other home decor items. Punch needle tufting is gaining popularity among DIY enthusiasts because it allows crafters to produce beautiful pieces quickly while exploring their creativity!
Punch needle tufting is a creative method where a hollow needle punches yarn through a backing fabric, forming loops on the surface. Unlike traditional rug hooking, which typically uses a hook to pull yarn through a backing, punch needle allows for faster and more intricate designs. This technique can be used for various applications, including rugs, cushions, and even wall art! I love how versatile this craft is, and I bet you will too!
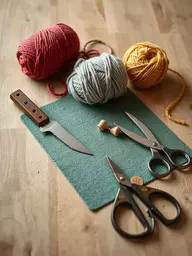
To embark on your punch needle adventure, you’ll need a few essential tools. Here’s a quick checklist to get you started:
These tools are the foundation of your tufting setup, and investing in quality items will make your crafting experience much smoother. Remember, having the right punch needle tools is key to creating stunning results!
When selecting a punch needle, you’ll find that they come in various sizes, each suited for different yarn thicknesses. If you're just starting, I recommend a medium-sized needle, typically around #10 or #14, as it works well with most yarns. As for yarn, consider exploring a mix of natural fibers, such as cotton and wool, to see what you enjoy working with!
The right fabric is crucial for achieving the best results in punch needle tufting. Monk’s cloth is a popular choice because it’s durable and has a tight weave that can hold the loops securely. You might also come across burlap or linen, but be sure to choose a backing that fits your project needs. Picking the right fabric will ultimately enhance the quality and longevity of your creations.
A well-organized workspace can make your tufting journey much more enjoyable! Here are some tips to create an effective crafting space:
With the right setup, you'll find that your creativity flows more freely, and you’ll be more excited to tackle your punch needle projects!
Here's a brief recap of the key points discussed so far:
Punch needle tufting is a crafting technique that uses a hollow needle to push yarn through a fabric, creating loops on the surface. This method is faster than traditional rug hooking and allows for a wide range of textured designs.
You'll need a punch needle (a medium size like #10 or #14 is recommended for beginners), suitable yarn (wool or cotton are good choices), monk's cloth as a sturdy backing fabric, and a hoop to keep your fabric taut.
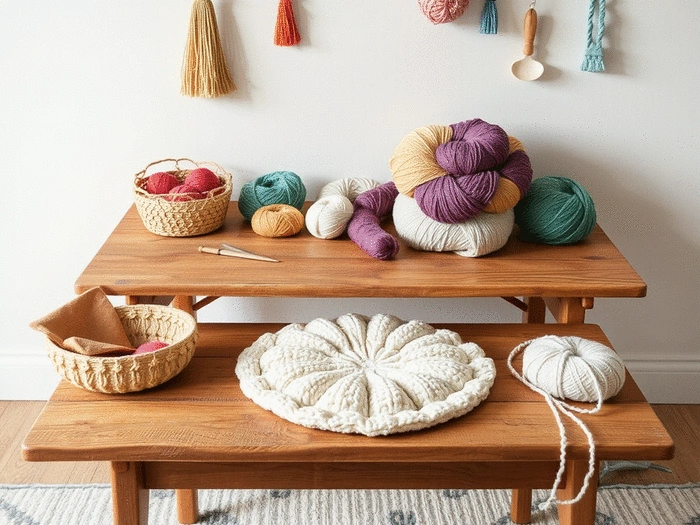
Wool yarn is a popular choice due to its durability and texture. Cotton yarn can also be used, and experimenting with a mix of natural fibers can help you discover what you enjoy working with most.
Monk’s cloth is highly recommended for its durability and tight weave, which securely holds the yarn loops. Burlap or linen can also be used, but always ensure the fabric's weave is appropriate for your chosen needle size and yarn thickness.
You can find numerous resources online, including courses on platforms like Skillshare and Udemy, video tutorials on YouTube, and online tufting communities. Local craft stores and art centers may also offer workshops.
Proper finishing includes trimming excess fabric around the edges for a neat look, applying a non-slip rug backing for stability and safety, and securing any loose threads to maintain the integrity and longevity of your work.
Congratulations on taking those first exciting steps into the world of punch needle tufting! Now, it’s time to build on your newfound skills and transform yourself from a beginner into a confident tufting artist. There are plenty of resources and communities out there that can help you along your journey!
To expand your tufting knowledge, consider engaging with various resources and communities tailored for crafters like you. Here are some options to explore:
Connecting with others who share your passion can propel your skills forward and motivate you to keep crafting.
Ready to dive into your first punch needle project? Here are some tips to help you choose the right pattern and get started with confidence:
Remember, this is your creative journey! Don’t hesitate to let your personality shine through in your designs.
Once your project is complete, don’t overlook the finishing touches! Proper finishing techniques are essential to ensure your tufted rugs are polished and durable. Here are a few key methods to consider:
By finishing your rugs properly, you’ll enhance their longevity and keep your beautiful creations looking their best!
Here is a quick recap of the important points discussed in the article:
All-in-One Beginner Bundle
By BESGEER
Everything you need: tufting gun, frame, trimmer, 42 yarn rolls, and cloth included.
Pro Rug Making with LED Light
By Cozytuft
120W brushless motor with adjustable speed for smooth, quiet rug creation.
I'm Cassandra Flint, a **passionate DIY enthusiast** and *tufting expert* dedicated to helping you dive into the world of rug making. I share detailed tutorials, honest product reviews, and *curated recommendations* to help you **confidently create stunning home decor**. My goal is to empower you with the knowledge and tools you need to _transform yarn into art_ and **avoid common pitfalls**.
Step-by-step guide to handmade textile bliss
By Gatlin Ares
A quick handbook for raised-pile textile techniques and rug ideas.