Factors to Consider
- Enough space to maneuver
- Well-lit area (natural light preferred)
- Good ventilation for fumes
May 05
Are you eager to create your dream tufting workspace? Setting up the right environment is key to unleashing your creativity and enhancing your craft. With the right considerations in mind, you'll transform your space into a sanctuary for tufting artistry.
Setting up an efficient and inspiring tufting studio involves careful planning across several key areas. Below is a visual breakdown of the crucial factors to consider and how to address common challenges.
Are you ready to set up your own tufting studio? Creating the perfect workspace is the first step on your journey to crafting beautiful rugs! As someone who has navigated this process myself, I know how essential it is to have a space that inspires creativity and allows for efficiency. Let’s dive into the key considerations to keep in mind.
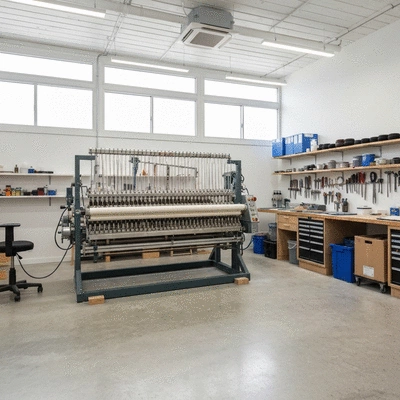
Finding the ideal location for your tufting studio can make all the difference. You want a spot that feels comfortable and encourages your creativity. Here are some factors to consider:
When I first started tufting, I quickly learned that having an inviting workspace not only boosts productivity but also makes the crafting experience more enjoyable! Remember, it’s all about creating a space where you feel at home. For those just starting, learning about tufting gun kits for beginners can be a great first step.
Beyond the basics, consider how you’ll be using the space. Will you be working on multiple projects at once, or do you prefer to focus on one rug design at a time? Think about how you can organize your materials and tools efficiently. Good lighting is crucial, too! A bright environment helps you spot any mistakes early on, so you can correct them before they become larger issues.
Ventilation is often overlooked, but it matters! If you're using adhesives and sprays, having fresh air circulating can keep your workspace pleasant and safe. Trust me, you’ll thank yourself later for planning this out!
Now, let’s talk flooring. While it might seem trivial, having hard flooring in your tufting studio can be a game-changer. It’s easier to clean, which is a significant advantage for managing dust from yarn and fabric. Plus, hard surfaces provide the stability you need for your tufting frame, ensuring your projects stay steady while you work.
When I switched to a hard floor, I noticed a marked difference in how much easier it was to maintain my workspace. It’s one of those small details that can have a huge impact on your overall tufting experience!
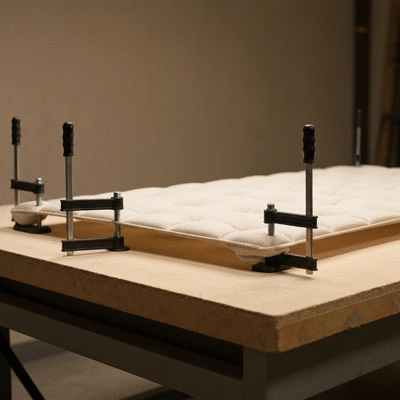
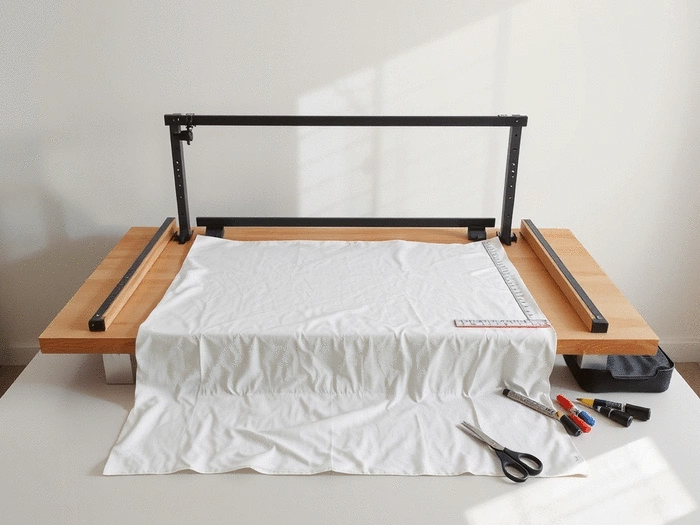
Once you have your space set up, it’s time to think about the equipment you'll need. The right tools and a well-assembled tufting frame are crucial for achieving the best results. Here’s what you need to keep in mind:
Setting up your tufting frame is one of the most exciting parts of this process. It’s where your imagination starts to take shape, and I can’t wait for you to experience that thrill! For a deeper dive into what tools you might need, explore tufting gun supplies to consider.
Stabilizing your tufting frame is key to a successful project. Depending on your workspace, you might opt for different mounting techniques. Ensure that the frame is level and secure to avoid any mishaps while tufting. I’ve found that using clamps to secure the frame to a heavy table works wonders for stability!
Engaging with the setup process can be quite rewarding. Take your time to get it right, and you’ll be set up for tufting success.
When it comes to tufting frames, you might decide between wall-mounted and table-mounted options. Each type has its own benefits:
Choose the frame that best fits your needs and available space. You’ll be glad you put thought into this decision as you start bringing your rug designs to life!
Before you begin tufting, there are a few essentials to set up your frame properly. Ensure your fabric is securely attached and the tension is even across the surface. If the fabric is too loose, it can lead to messy edges and uneven designs!
Spend a few extra minutes on this step; it’s well worth the effort when you see the clean lines of your finished rug. I promise, getting it right at this stage will save you a lot of headaches down the line!
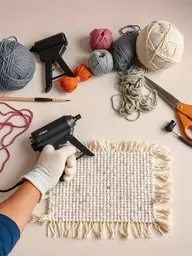
As you set up your tufting workspace, consider incorporating a pegboard for organizing your tools and materials. This not only maximizes your space but also makes it easier to access everything you need while working. A well-organized workspace can significantly enhance your efficiency and keep your creativity flowing!
Setting up your tufting workspace can sometimes feel like a puzzle, with various challenges popping up along the way. I’ve encountered my share of hiccups, and I want to help you navigate these hurdles with ease! Let’s tackle some common setup issues together and find practical solutions that can keep your tufting journey smooth and enjoyable.
As you dive into tufting, it's vital to be aware of potential problems that may arise. Here are a few of the most common setup challenges you might face:
By focusing on these challenges, you can implement simple strategies to enhance your workspace. For instance, if your frame is wobbling, make sure it’s secured properly. Use clamps or additional supports to ensure stability while tufting!
A wobbly frame can throw off your entire project! To tackle this issue, ensure your frame is mounted on a flat and sturdy surface. You might even consider placing weight on the frame’s base to improve stability. For uneven tension, regularly check the fabric tension as you tuft. Pay attention to any slack or tight spots! Adjust accordingly to maintain consistent pressure.
Dust is an inherent part of the tufting process. Creating a clean workspace is essential for both your health and the quality of your work. I recommend setting up a vacuum nearby to quickly handle any debris as you craft. Additionally, ensuring good ventilation can help minimize dust accumulation and improve air quality.
Safety should always be a priority in your crafting space. Here are some essential safety items you should consider having on hand:
Having the right safety equipment not only keeps you safe but also allows you to focus on your creative process. Remember, a secure environment is a happy one!
The most important factors are ample space to maneuver, good lighting (preferably natural), and proper ventilation to manage fumes and dust.
Hard flooring is recommended because it is easier to clean, especially for yarn dust, and provides a stable surface for your tufting frame, preventing wobbling.
Essential equipment includes a sturdy tufting frame, a reliable tufting gun, backing fabric, yarn, and safety gear like gloves and goggles.
To prevent wobbling, ensure your frame is mounted on a flat and sturdy surface. You can also use clamps to secure it to a heavy table or place weights on its base for added stability.
Budget-friendly tips include repurposing existing items, shopping secondhand for equipment, creating DIY storage and frames, buying materials in bulk, and taking advantage of sales.
Are you eager to start tufting but worried about expenses? Don’t fret! Setting up your tufting space doesn't have to break the bank. With some creativity and resourcefulness, you can create an inspiring workspace without overspending. Let’s explore some cost-effective solutions together!
Here are some budget-friendly ideas to help you get started:
By being resourceful, you can save money while still creating a functional workspace that fits your needs. You can also consider checking out buying your first tufting kit for an all-in-one affordable option.
It's easy to feel overwhelmed by the number of tools available for tufting. To help you prioritize, here’s a simple list distinguishing the essential tools from the optional ones:
Focusing on the essentials first will allow you to get started efficiently. You can always add optional tools as your skills and projects grow!
When you're just starting out, it's crucial to manage your budget wisely. Here are a few tips to keep in mind:
With these budgeting tips, I know you’ll be able to create your tufting workspace without financial stress. Remember, the key is to start small and gradually invest in your tools as you grow more confident in your tufting journey!
Here is a quick recap of the important points discussed in the article:
Complete Rug Making Duo
By BESGEER
2-in-1 tufting gun bundled with carpet carving clippers for a professional finish.
Digital Speed Control Display
By zowwfast
Non-slip grip with digital screen for precise speed control and safer tufting.
I'm Cassandra Flint, a **passionate DIY enthusiast** and *tufting expert* dedicated to helping you dive into the world of rug making. I share detailed tutorials, honest product reviews, and *curated recommendations* to help you **confidently create stunning home decor**. My goal is to empower you with the knowledge and tools you need to _transform yarn into art_ and **avoid common pitfalls**.
Essential techniques and creative beginner projects
By SIMJI
Learn tufting gun basics, finishing tips, and playful rug projects.