Causes of Fabric Tearing
- • Fabric Type (e.g., silk vs. denim)
- • Poor Machine Setup (tension, needle)
- • Wear and Tear (regular use)
🧵
May 28
Have you ever faced the frustration of fabric tearing while working on a creative project? Understanding the causes behind fabric damage can not only save you time and money but also enhance your crafting experience. In this guide, we’ll explore essential insights that every DIY enthusiast should know!
This visual outlines the primary causes of fabric tearing, common symptoms, and a process flow for prevention, ensuring your projects remain pristine. For a deeper dive into optimal material choices, consider choosing your primary tufting cloth wisely.
Routine Machine Maintenance
Test Swatches & Fabric Checks
Adhere to Washing Instructions
As someone who loves working with various fabrics, I've encountered my fair share of fabric tears. Understanding the causes of fabric tearing can save you time, money, and frustration in your crafting projects. Let's dive into the crucial aspects of this topic!
Fabric tears can occur due to a variety of factors. Recognizing these causes not only helps in preventing future mishaps but also enhances your overall crafting experience. Whether you're a seasoned pro or just starting out on your journey with tufting gun kits for beginners, knowing these aspects can significantly boost your confidence!
There are several reasons why fabric may tear, and it's essential to understand these factors. Here are some of the most common causes:
Each of these elements plays a crucial role in your crafting process. For instance, if you’re using a delicate fabric, it’s vital to adjust your machine appropriately to avoid tears. I’ve learned this the hard way, and it’s one of those lessons that stays with you!
The type of fabric you choose greatly impacts its susceptibility to tearing. For example, lightweight fabrics like chiffon are more prone to damage, while heavier materials like canvas hold up better under stress. I often recommend experimenting with different fabric types to find what works best for your projects.
Here’s a quick overview of common fabric types and their tearing tendencies:
Understanding these differences can be a game-changer in your crafting journey, making it easier to select the appropriate fabric for your next tufting project!
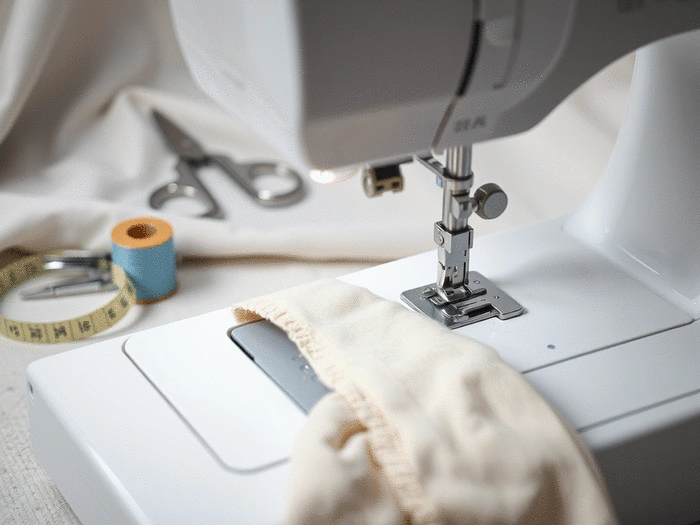
Another critical factor in preventing fabric tears is ensuring that your machine is set up correctly. Improper tension, incorrect needle size, and unsuitable stitch length can all contribute to fabric damage. I can't stress enough how essential it is to double-check these settings before starting any project!
Here are some common machine setup issues that could lead to tears:
By taking the time to adjust your machine settings, you can significantly reduce the risk of fabric tearing and get on with creating beautiful pieces!
Now that we’ve covered the causes, let’s talk about how to identify if your fabric is experiencing damage. Knowing the symptoms can help you address issues before they worsen!
Watch out for the following signs that may indicate tearing:
It’s essential to distinguish between tearing, fraying, and puckering to address the issue appropriately. Tearing refers to a complete rupture in the fabric, while fraying is when the edges start to unravel. Puckering, on the other hand, is when the fabric gathers or ripples, often due to tension issues.
Understanding these differences ensures that you can react in the right way, whether it’s a simple repair or a need to adjust your crafting techniques!
One effective way to diagnose fabric damage is through visual decision trees that guide you in identifying the type of issue at hand. These trees can be incredibly helpful for beginners! They allow you to assess the damage step-by-step.
Imagine having a flowchart handy that helps you determine the next course of action based on what you see. It’s a great tool for anyone looking to improve their fabric handling knowledge.
The quality and composition of your fabric play a vital role in its potential for tearing. Higher quality fabrics tend to withstand stress better than their lower-quality counterparts.
To gauge the durability of your fabric, consider these factors:
The weave and weight of your fabric are critical factors in its overall durability. Heavier fabrics often have a tighter weave, making them less prone to tearing. Conversely, lightweight fabrics with a loose weave are more susceptible to damage.
Consider the following when choosing fabrics for your projects:
By understanding these characteristics, you’ll be well-equipped to select fabrics that not only inspire you but also hold up beautifully during your tufting adventures!
Did you know? Regularly testing your fabric with swatches can save you a lot of trouble down the line! By experimenting with different settings and materials before starting your main project, you can identify the right tension, needle size, and stitch length needed for the specific fabric you're working with. This practice not only boosts your confidence but also ensures a smoother crafting process.
As we wrap up our discussion on preventing fabric tearing, it’s essential to recap the vital points that can help you maintain the integrity of your fabrics. By implementing a few simple strategies, you can significantly reduce the risk of damage and enhance your sewing projects. Let's dive into the main takeaways!
By keeping these points in mind, you’ll be better equipped to tackle fabric tearing challenges and create beautiful, lasting projects! Remember, a little knowledge goes a long way in the crafting world.
To truly prevent fabric tearing, establishing a routine of maintenance and pre-sewing checks is crucial. This practice not only enhances your sewing experience but also boosts the quality of your finished products. As a DIY enthusiast, I can’t stress enough the importance of these foundational steps!
Incorporating these checks into your sewing process will help ensure that you catch any potential issues before they escalate, allowing you to focus on your creativity instead!
Using test swatches or sample runs is a fantastic way to gauge how different fabrics will behave under your sewing machine. This practice can save you from heartache down the line! Here’s why you should start doing this:
By testing your materials first, you're setting yourself up for success! Don't skip this step; it can make all the difference in your projects. For more insights on materials, consider choosing yarn and fabric wisely.
Creating a personal prevention checklist can streamline your sewing process and ensure you don’t overlook crucial steps. Here’s a simple template to get you started:
Having a checklist will not only keep you organized but also reinforce best practices each time you sit down to sew. You might just find that it boosts your confidence and creativity!
Now that we’ve covered some essential strategies, it’s time to put this knowledge into action! The journey of a seamstress is filled with opportunities for learning and growth. I encourage you to embrace the challenges and remember that every experience is a stepping stone toward mastery.
By actively applying what you’ve learned, you’ll not only enhance your skills but also enjoy the process of creation even more!
There’s a wealth of resources available for those looking to deepen their understanding of fabric and sewing techniques. Check out the following options to broaden your horizons:
These resources can provide valuable insights and help you connect with others who share your passion for sewing. Don't hesitate to explore!
Your experiences are invaluable! I’d love to hear your stories about fabric tearing and how you overcame those challenges. Sharing our insights creates a supportive community where we can all grow as crafters. Feel free to drop your thoughts in the comments below!
Finally, it’s important to recognize how environmental factors can impact fabric durability. Simple care instructions can make all the difference in extending the life of your fabrics. Always refer to the washing instructions provided with your materials!
Following the washing instructions specific to each fabric can prevent unnecessary wear and tear. Here are some best practices to keep in mind:
Taking these steps will help you maintain the quality of your fabrics, allowing you to enjoy your beautiful creations for years to come.
A: Fabric tearing can be caused by various factors, including the type of fabric (e.g., delicate silk vs. durable denim), poor machine setup (incorrect tension, needle size, or stitch length), and general wear and tear from regular use.
A: To prevent fabric tears, ensure your machine has the correct tension and needle size for your fabric. Always use appropriate stitch length, perform routine machine maintenance, and conduct test runs on fabric swatches before starting your main project.
A: Tearing is a complete rupture in the fabric. Fraying occurs when the edges of the fabric start to unravel. Puckering is when the fabric gathers or ripples, often due to tension issues or uneven stitching.
A: Yes, fabric quality and composition significantly impact durability. Higher quality fabrics, often with tighter weaves and heavier weights, tend to be more resistant to tearing compared to lower-quality, loosely woven, or lightweight materials.
A: Test swatches are crucial because they allow you to experiment with different machine settings (tension, needle, stitch length) on a small piece of your specific fabric. This helps you understand how the material behaves and fine-tune your approach, preventing potential damage to your main project.
A: Adhering to proper washing instructions is vital for fabric longevity. Using gentle cycles for delicate fabrics, avoiding harsh detergents, and air-drying when possible can prevent premature wear, maintain fiber integrity, and minimize the risk of damage over time.
Here is a quick recap of the important points discussed in the article:
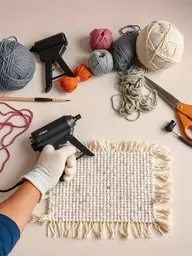
Complete Rug Making Duo
By BESGEER
2-in-1 tufting gun bundled with carpet carving clippers for a professional finish.
Pro Rug Making with LED Light
By Cozytuft
120W brushless motor with adjustable speed for smooth, quiet rug creation.
I'm Cassandra Flint, a **passionate DIY enthusiast** and *tufting expert* dedicated to helping you dive into the world of rug making. I share detailed tutorials, honest product reviews, and *curated recommendations* to help you **confidently create stunning home decor**. My goal is to empower you with the knowledge and tools you need to _transform yarn into art_ and **avoid common pitfalls**.
Your complete resource to learn and love the craft
By Amy Oxford
Deepen fiber-art skills with instruction, projects, and finishing ideas.